Create a blog
To start a blog with Blogger, visit the Blogger homepage, enter your username and password, and click Sign in. Enter a display name and accept Blogger's Terms of Service. Then click the Create a Blog link and get started!Pick an address (URL) and a blog title. Then, choose your favorite blog template (this is how your blog will look when you publish it). Now get creative, add information to your personal profile, and customize how your blog looks, if you feel up to it. Start blogging now!
Back to top
Dashboard
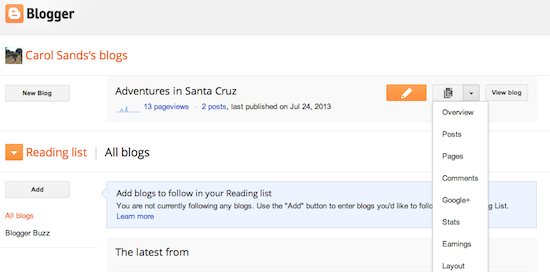
Your Dashboard, as always, is your starting point. This is where all your blogs are listed, and you can click on the icons next to them to perform various actions on each blog, such as:
- Writing a new post: Just click on the orange Pencil icon on your Dashboard to access the Post Editor.
- Viewing your posts: The gray Post List icon will take you to a list of your published and drafted posts for a specific blog.
- Catching up on your favorite blogs: Below the list of your own blogs, you’ll see a list of the blogs you follow with an excerpt from their latest posts.
- Everything else: Check out the drop-down menu next to the Post List icon for a quick link to:
- Overview
- Posts
- Pages
- Comments
- Stats
- Earnings
- Layout
- Template
- Settings
Back to top
Overview
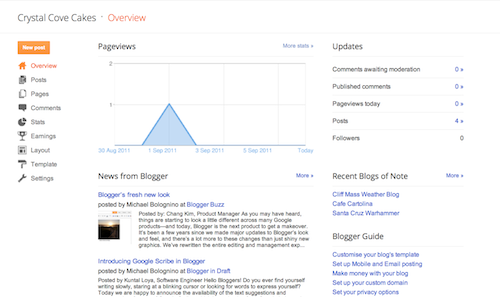
On the Overview tab, you can see your blog’s activity, news and tips from the Blogger team, and recent Blogs of Note.
Back to top
Write your post
Once you've signed in to Blogger, you'll see your dashboard with your list of blogs. Here's what you need to do:- Click the orange pencil icon to write a new post, and enter anything you want to share with the world.
- Next, you'll see the Post Editor page. Start by giving your post a title (optional), then enter the post itself:
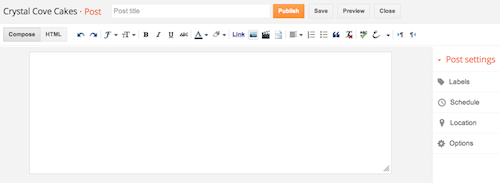
- When you're done, click the Preview button at the top to make sure it's ready to go, and then click the Publish button to publish your post.
Add an image
You can add an image from your computer or the Web to your blog. Click the image icon in the Post Editor toolbar. A window appears prompting you to browse for an image file on your computer, or enter the URL of an image on the Web.Once you've selected your image, you can then choose a layout to determine how your image will appear in your post:
- The 'Left', 'Center', and 'Right' options allow you to customize the way your blog text will flow around your image.
- The 'Image size' options will determine how large the image will appear within your post.
You can also publish images to your blog using your mobile device, Google's free photo software Picasa, or a third-party service like flickr.
Back to top
Add a video
To add a video to your blog post, click the film strip icon in the Post Editor toolbar above where you compose your blog text. A window appears prompting you to 'Add a video to your blog post.'Click Browse to select the video file from your computer that you'd like to upload. Note that Blogger accepts AVI, MPEG, QuickTime, Real and Windows Media files and that your video must be less than 100MB in size.
Before uploading your video, add a title in the 'Video Title' box and agree to the Terms and Conditions (you'll only have to do this the first time that you upload a video with Blogger). Then click UPLOAD VIDEO.
While your video uploads, you'll see a placeholder in the post editor showing where your video will appear. You'll also see a status message below the post editor letting you know that your upload is in progress. Depending on the size of your video, this usually takes about five minutes. When it is complete, your video will appear in the post editor.
Back to top
Customize
Your template is a fun way to customize your blog. When creating a new blog, you're first asked to choose a default template, this is the basic design of your blog. You can choose from many templates for your blog; simply pick the one that best fits your needs.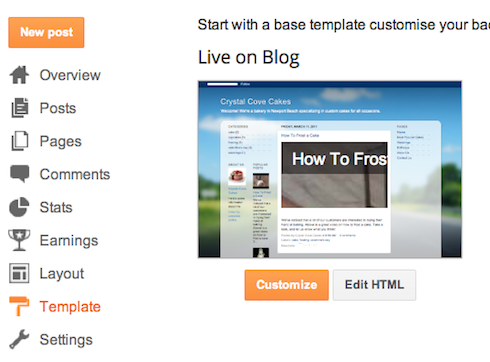 Once on the Template tab, you can either click on the orange Customize button to get started with our easy-to-use WYSIWYG (“What you see is what you get”) template designer, or choose one of our many default templates. If you’d like to edit the HTML of your blog, just click the gray Edit HTML button.
In addition, you can customize your blog's design using our intuitive drag-and-drop interface. You can also add powerful gadgets such as slideshows, user polls, or even AdSense ads. If you want more precise control over your blog's layout, you can also use the Edit HTML feature. To edit your blog's layout, follow these steps:
- Click Layout from the drop-down menu on your dashboard below the blog you would like to customize.
- From there, click Edit to edit existing gadgets, or Add a Gadget to add new ones.
- To add a new gadget after you've clicked Add a Gadget, simply click the plus sign next to your desired gadget. You can choose from gadgets by category, or search for a specific gadget in the top right of the pop-up window.
- Once you've added the necessary information to your selected gadget, click the orange Save arrangement button. Your layout changes will appear instantly.

Privacy and permissions
By default, your blog is completely public, and can be read by anyone on the internet. However, if you want to keep it private, you can do that, too. You can change these settings on the Settings | Basic tab.
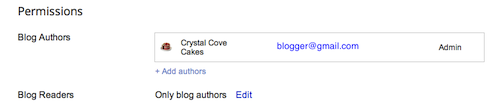
- Under the 'Blog Readers' section, you'll probably see 'Anybody' selected as the default. When you change this to 'Only these readers,' you'll get an Add Readers button.
- Click the Add Readers button and then enter the email address of a person to whom you'd like to grant access to your blog. To add multiple people, separate their addresses with commas.
- For each address entered, the Google Account associated with that address will be given access to view your blog. If an address is not associated with an account, that person will receive an invitation email with a link allowing them do one of three things:
- Sign in to an existing account.
- Create a new account.
- View your blog as a guest (no account required).
5. Choose and implement streams of income
Before we dive into the particulars of income streams, the bonus pack provides an analogy to help you understand what I call the 4-legged approach .Alright.
Once your blog has earned trust, think about making money. Many people want to focus solely on this, but if you try to dive into monetizing before you’ve really built your platform, you run the risk of damaging the good reputation you so desperately need.
There are numerous ways bloggers make money. Each blogger has a different combination of income streams. There is no “right” way to make money blogging. And that’s the beauty of it. There are endless possibilities.
Income streams ebb and flow, so successful bloggers are constantly exploring new ways to make money. The key to making good money as a blogger is to have multiple streams of income. Even small trickles of money coming from various sources over time can really add up.
At the risk of sounding corny, the best way to start monetizing is to let it grow organically out of what you are already doing. Hopefully you are blogging about something you enjoy. As you grow, look for ways to monetize that would most suit you and your audience. Following are a list of income streams bloggers adopt, broken down into five main categories:

Unlike many of the other categories, advertising is all about generating income directly from your blog, website or other digital asset(s).
Display Ads
Display ads are graphics or images similar to billboards or ads in a magazine. Typically they are positioned on your site in the sidebar, header, footer or within your content. Sometimes they are referred to as banner ads.Ads on your site are meant to complement your blog’s content, making them attractive and relevant to visitors. Advertisers hope that your visitors will then click on those images to explore and purchase the products or services they offer.
Display ads are often provided through ad networks. Ad networks are companies that pair advertisers with publishers (bloggers). Ad networks act as a middle man between advertisers and publishers, negotiating partnership details between the two. The ad network takes a cut from the partnership profit.
Ad networks are attractive to many bloggers because they take the hassle out of display advertising. Some ad networks, like Google Adsense, are relatively easy to get into and are easy to set up. Other ad networks, though, are selective in who they accept.
Examples of ad networks are Google AdSense, Blogads, BlogHer, Beacon Ads, Federated Media, Sovrn, (formerly Lijit), Media.net, Rivit, Sway. There are many more, so once you get involved in your niche’s community of bloggers, you’ll soon hear of others.
Can you really make money with Google AdSense?
This is a very popular question, and a good one. Google Adsense is probably the most popular ad network and a good place for beginning bloggers to start if they want to pursue display ads because it’s so easy to set up.However, if you want to make really good money with Google AdSense, you either have to be in a unique niche in which advertisers will pay a lot of money for clicks on their ads (hard to find), or you have to have a lot of traffic (hard to get, especially for beginners). For these reasons, I don’t recommend AdSense (or display advertising in general) as the main pursuit for new bloggers.
Tips:
- If you want to get an idea of pricing and traffic for popular blogs, sites like Beacon Ads and Federated Media are places you can do that.
- If you’re using CPC/PPC ads (cost per click/pay per click), check out Google’s recommendations for best ad placement on your site. It’s important that your content doesn’t get drowned out by ads. Google has indicated sites with too many ads above the fold may be penalized in search. If you’re not sure what above the fold is on your site, use this tool.
- As always, experiment. Experiment with ad placement to get the right combination on your site.
* I NOW USE ADSENSE, CLICK ON SOME OF THE ADS FOR GREAT DEALS :)*
No comments:
Post a Comment